Sunday, July 24, 2011

Beach Bookmark

I just bought my first Copic marker "skin white"yesterday. I had originally coloured the boys hair, arms and legs and my friend Diana's house. She gave me some tips on shading and now I just have to practice. Anyway, had to buy the new marker because I didn't colour the torso on the boy. Guess I thought it was a shirt.
The swimmer boy is a bookmark so you can keep up with your summer reading by the pool.

Sunday, July 17, 2011

I Love Hearing From You

Instead of a card I decided to make a cd holder. You can record your favourite summertime music to give to a friend or take on vacation.
To make the sand look textured I used crumb cake card stock and a tearing tool.


Saturday, July 16, 2011

Design Challenge

Last week's design challenge. My colouring has improved. I used a combo of SU! markers and their water pens.

Thursday, July 14, 2011

Bank your Prize

RUN, don't walk (unless you are carrying scissors) to the Royal Bank at 185 Griffin St North in Smithville if you would like to win a workshop for you and 4 friends to make this cute note tote and 4 notelets. The display has been there since Monday and will remain until Friday.
This set is made with the Strength and Hope set from Stampin' Up! $2 of the sale of each of these sets in clear mount, wood mount or digital goes to Breast Cancer Research Foundation and is available until August 31, 2011.
If you don't get to the bank by Friday, don't worry, I'll be back again on September 19th to 23rd, 2011.

Sunday, July 3, 2011

She's A Brick House


I like to make this easel card shape because of the way it props up so nicely and for this card helps give it the wall effect. All the bricks are individually cut out and adhered to the card.

Saturday, July 2, 2011

Before And After

This is the before. It's supposed to be a walk in closet not a walk in disaster. It wasn't designed properly so it couldn't be used properly. If you were to hang clothes where you see the dress with the brown squares on it, you would not be able to open or close the closet door because the hangers would stick out too far. To fix this space, I found a book shelf at IKEA that fit exactly where you couldn't put hangers. This holds my purses, shoes and accessories.
The green dish was found at a garage sale, the 3 tier glass dish is from IKEA.
This little space was going to have a small bar for hanging clothes but I didn't realize how small it was so these hooks, surprise, surprise, also from IKEA went here for my necklaces.

Added a hook here to hang up clothes to be ready for the next day to make the morning go smoother.
The bottom shelf has enough height for boots and large beach totes.
Since the bookshelf was so high, the top shelf that runs around 2 of the walls went up higher which makes room for 2 tiers of clothes making the space more efficient.

When sorting out your clothes, remember, if it doesn't fit you or make you feel fabulous, then it shouldn't go back in the closet.

Monday, June 27, 2011

Slippery When Wet

Simple centre step card. Almost warm enough outside to want to go into the water.

Sunday, June 19, 2011

Ribbons And Bows


Time to get those bathing suits out. Both my squids got new suits in the past week. Maybe I should too...well, maybe I just keep it to making cards.

Sunday, June 12, 2011

Rub A Dub Dub

This little guy looks like my boy when he was little and playing in the bathtub. The floor frequently got just as wet.

Sunday, June 5, 2011

Corrosive Design Team First

This is my first design challenge for Corrosive Design Team. http://www.corrosivechallengesbyjanet.blogspot.com/
This week I was to use summer colours and a Paper Pretties image of which I chose Beatrice Butterfly. http://www.paperpretties.net/store/product/2165

Sunday, May 22, 2011

Royal Wedding

This is the very first card I received for the Royal Wedding card swap I hosted at Splitcoaststampers. It was created by Sheila, who, if you can believe it, just participated in her first swap.
Sheila used the Lili of the Valley wedding couple, stamped on water colour paper and hand coloured with water colour pencils and a blending pen.
Phenomenal work and what a delight for me to receive Sheila's first ever swap.
This card was created by Debi. I actually have this stamp set but never realized the immense versatility of Asian Artistry. If you look back in April of this year you will see the last item I created with this stamp set. I love what you have done and will now try to think outside the box.
This card was created by Pam. The black and white colours really make the pink flowers in the brides hair and the bow really Pop. I'm not sure if you can tell by the photograph but along the train of the dress glitter was very carefully added.
Diane made this heart shaped bride and groom from a punch. One of the things I am really impressed with, which I am afraid you may not be able to see, is that the grooms tux was punched in a black paper which is matt on one side and glossy on the other which makes the lapels stand out and give it the true formal wedding day tuxedo look.
True elegance. Go ahead and admire the precision cutting and the tone on tone loveliness. Ahhh, delightful!
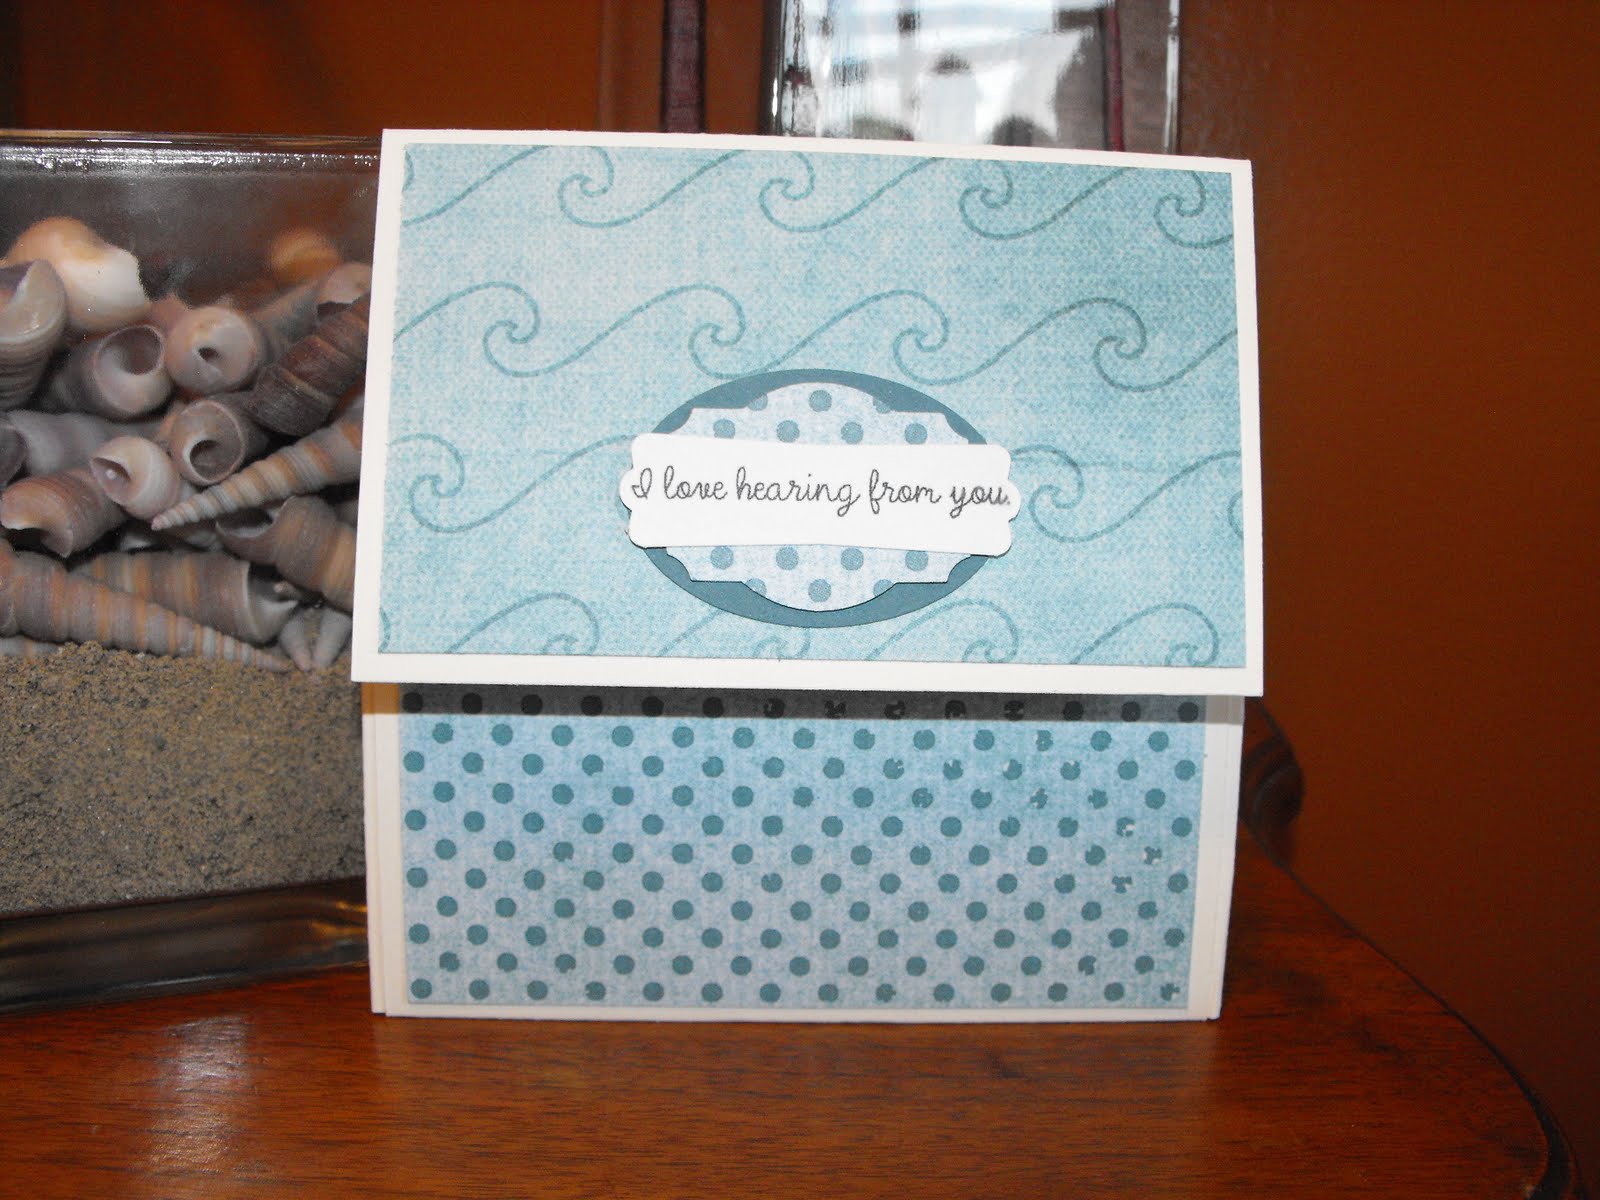
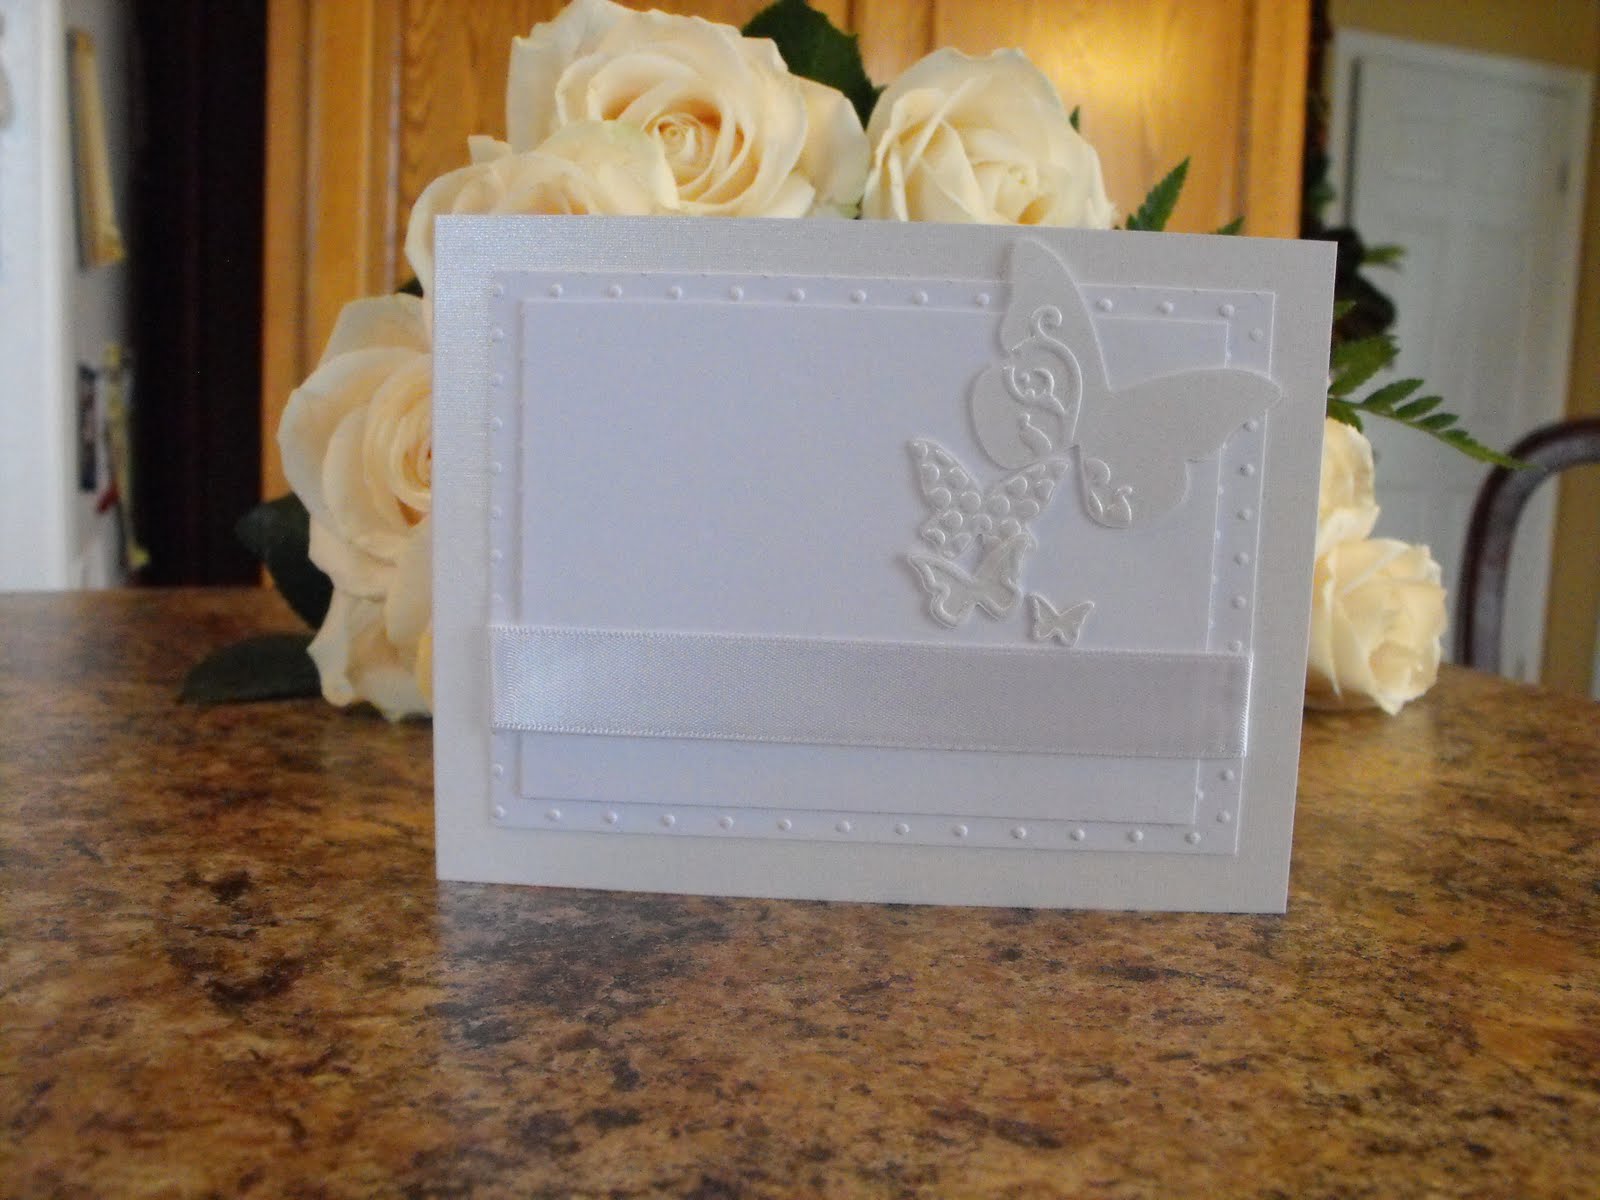
I'm sure Karen knows how much I am attracted to butterflies lately. Just love them and can't get enough of them. This card could take you any where, from the engagement party, the bridal shower or the wedding. Versatility plus!
Krissie sent these and let me tell you when I opened it up at the post office I thought it was a hoot. It got passed around and everyone had the same reaction: They loved it! You can see the punch is the same as Diane's but this is a completely different couple in completely different wedding dress. The grooms tie is a knotted ribbon and the bride has a traditional veil.
Lastly is Angie's card. There are 6 layers here on this vanilla and black card but the simplicity and elegance shine through. The scalloped circle wedding bells are on pop dots.

Looks like I need a thesaurus for lovely and elegant! Thank you ladies for participating in this swap.

Sunday, April 24, 2011

Season of Friendship Spring Bookmark


I've made a winter bookmark and now here is the spring addition. The "grass" is a pocket for the bookmark. Just got to work on a summer bookmark now.

Thursday, April 21, 2011

Fresh Cuts Necklace


I had run out of adhesive one day and didn't want to stop creating so I made this necklace using microscope slides, fresh cuts stamp set and blender pens. Stamped once, coloured, cut in half and mounted. Taadaa.

Tuesday, April 19, 2011

Have A Seat


I originally wanted to make one of the seats embossed in silver but I didn't bring my silver powder to Karen's house where we had a stampfest in her new home. Chrystine brought this set for me to use. Still love the way this turned out.

Monday, April 18, 2011

Bliss


This is the best set EVER from Sale-A-Bration. I will never get tired of it.

Friday, April 15, 2011

Aviary


What a cool stamp set. I'll have to try more cards with this. You can't tell from the photo but I used pop dots on the cage and tied on a little pice of hemp to the top.

Thursday, April 14, 2011

Which One Do you Like?


I had this card cut and stamped out for a long time but I didn't know how I wanted to make the fan. Which do you like better; folded or cut?

Wednesday, April 13, 2011

Occasions Mini Catalogue January 4 - April 30 2011


From the Occasions Mini catalogue, which can order from until April 30, 2011, I used the Vintage Flower Adornments and the Springtime Vintage Designer Series Paper, and the Decorative Label Punch. From the 2010 - 2011 Idea Catalogue I used Pocket Silhouettes, and Full Of Life stamp sets. Both of these were made at my friend Janet's house back in March.

Tuesday, April 12, 2011

Been Stampin' and Scrapin'


I've been stampin' and scrapin' but haven't been postin'. This is a little bit of what I've been doing. This is a retired set, Owl Together, from Stampin' Up! that I borrowed from my friend Diana. There is a slider card, a spinner card and I guess you might call the other a peek a boo card.

Sunday, March 6, 2011

Some progress

I've needed to post these photos for awhile now because these pages have been scrapbooked for weeks. I even journaled! Check out the space this created on my table top!

I've made several cards since then and will post on that next.


Sunday, January 16, 2011

10 Days Later


What did I get done in the past 10 days? Well, I made a space just big enough to work on but wanted to spread out so I started working on the floor. I ran out of black background paper and also decided I needed some red lettering for a title. This past Friday I went to Oakville to get 6 12x12 black cardstock and red letter stickers from a former Creative Memories consultant. The Sunday after I started scrapbooking again I went to Walmart to pick up enlarged photos. I also had some 4x6 printed out that I thought I had not previously printed out BUT it turned out that I did...this is the kind of problem that happens when you are not organized. Hopefully it won't happen again.
The goal for the next 7 to 10 days is to finish this event I'm scrapbook which is our trip to the AGO back in February of 2010 where we viewed the King Tut exhibit. I will also have any pictures printed out that I might need for the next pages. Until then, keep yourself organized so you don't have a craft room that looks like mine.

Wednesday, January 5, 2011

Time To Start Organizing

What Happened?! Was I ransacked and robbed? No. That would be less humiliating. This is the big sty I create in. Ok, it's just a pig sty now because I can't do anything in here and haven't for at least 2 months.
How can I get started to make it right? Apparently the first thing I have to do is show the world which means that now I am accountable to not just myself but to you too.
Here is what else I'll do, (Yes, I'm making it up as I go along but it sounds good in my head right now) I'll post weekly pictures to show the progress.
Don't be afraid but I think it will look worse before it looks better.
I want to work on scrapbooking and I also want to work on cards. Checkout the surface area my "desk". Did you notice? That's right not one inch of clear space.
I'll attempt to clear space on the table and create ONE project to show. I'll go for a page of scrapbooking.
I better get started. See you next week.